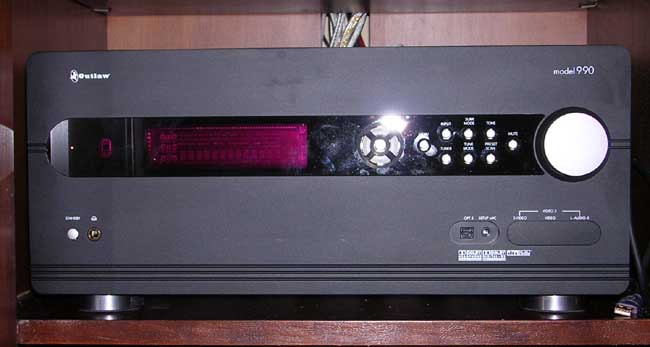

Outlaw announced the Model 990 surround sound processor in April 2005 and began shipping units in May 2005. It has been a great success for them, but there were a few software issues rattling around and some interface improvements requested by users that led Outlaw to work on a firmware update. That work has yielded the first update for the Model 990, which I've installed and spent a bit of time with now. The result is a separate little review to look at the firmware update process and the changes contained in the new firmware. I'll add to this page when/if future updates are released. To return to my main Model 990 review, click here. You can find an equipment list at the end of this page (updated to reflect the couple of upgrades I've made since I put together my 990 review originally).
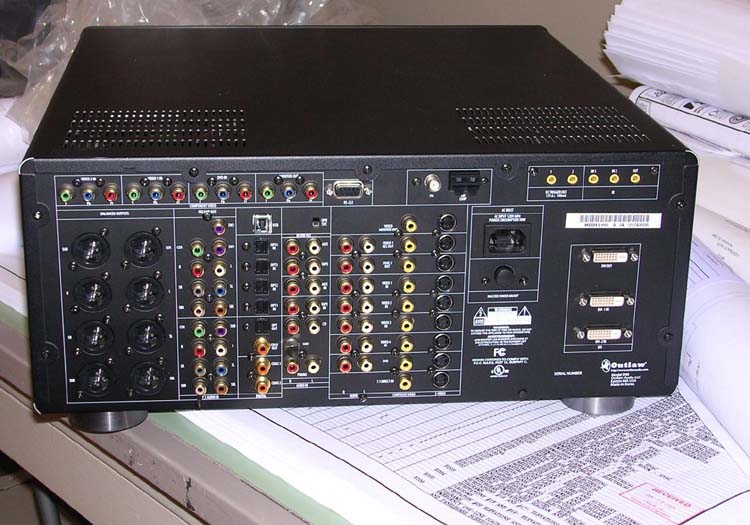
The Model 990 supports two methods of installing new firmware. One is the RS-232 port, a method long used for updates and for integration with home automation control systems. The other is the USB port, which is a more common and often more convenient computer interface that also serves to allow audio playback from copmuters through the 990. Both ways follow the same basic approach. Look at the picture below to see the USB and RS-232 ports as well as the OPR/SVC switch (all located at the top of the rear panel, near the center).

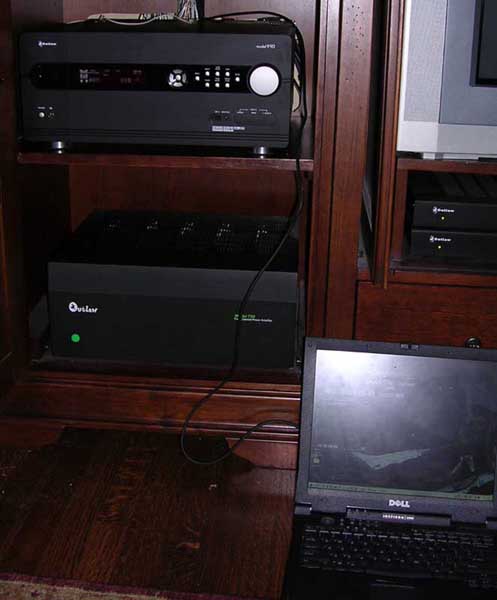
Now that you've found the ports and the switch, we can talk about how to get the firmware installed. The first step is to connect either a serial cable ("straight through" type, not a null modem type) or a USB cable (type A connector to type B connector) to the 990 and to your PC. I used our old Dell WindowsME laptop for this (as pictured below). You'll need to install the firmware update program on your PC (it's only available as a Windows app, and is available for download from Outlaw's site).

You'll need to be careful about the update process. Some folks have run into problems with this, which seem to mainly relate to getting the USB driver installed and happy for a USB update (RS-232 updates seem to run more smoothly). I'd strongly recommend printing out the instructions from Outlaw's site (available here) and following those instructions closely – doing that went smoothly for me. Once you do that, you're 990 will have the latest firmware and be ready to go. In the next section, I've got some notes about what that new firmware includes.
Firmware updates can serve not only to fix problems but to also refine the user interface and even add some features. Each firmware release will be discussed below (currently there's just one).
On May 21, Outlaw Audio released a firmware update for the 990 (available from Outlaw's site, with links to the update available on both the Support and Model 990 pages). This update resolved several issues with bass management operation and refined the user interface a bit. The "SYNC" button on the remote now displays the active input's AV sync adjustment setting on the 990's front panel, allowing users to adjust it even when the active video input doesn't allow on-screen pop-ups (a component or DVI input, in other words). The surround mode buttons' behavior has been adjusted so that the first time one of them is pressed the current surround mode is displayed on the front panel display, allowing users to readily confirm what mode is in use without having to cycle through all the available modes. The audio inputs' names can now be edited in the input setup section of the menu (my TAPE input is now labeled "iPOD", for example) just like the video inputs' names. The 7.1 Direct input can also now be selected from the front panel (it was previously left off the list of inputs that could be scrolled through using the front panel controls). The direct tuning of AM stations above 1200 is corrected with this update (previously, typing any number higher than 1 into the hundreds position would insert a space prior to the number – a carry-over from a useful trait tied to the "thousand" space that prevents folks from tuning in stations at 2000MHz or higher). In addition to these interface improvements and bug fixes, Outlaw resolved several bass management configurations that were not behaving as intended. The best way to summarize those changes is probably to look at the next section, which focuses specifically on the bass management design of the 990. For convenience, I've summarized the changes associated with the May 2006 firmware in the list below.
May 21, 2006 Firmware Update (3.10):
June 13, 2006 Firmware Update (3.11):
May 30, 2008 Firmware Update (3.24):
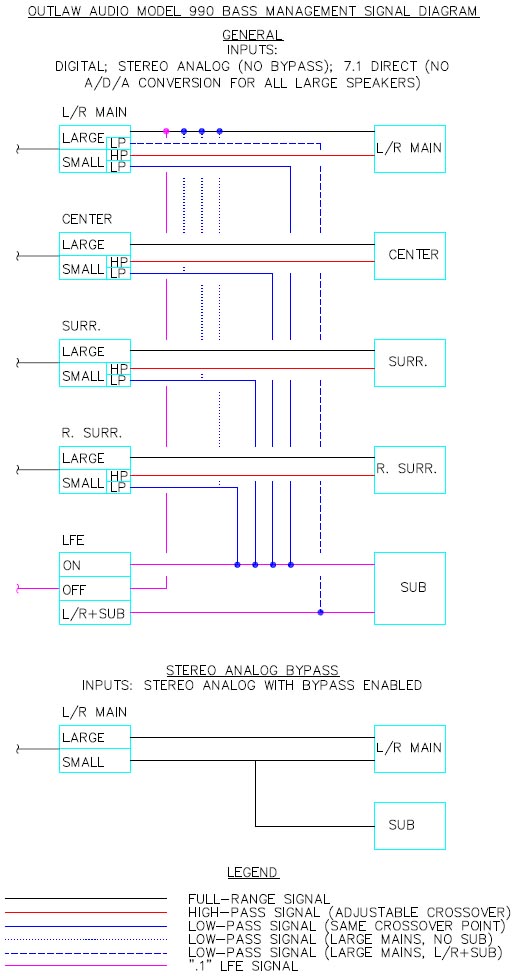
One of the major issues addressed by the 990's May 2006 firmware update was the behavior of bass management in certain modes. During discussions in the Saloon about a couple bass management bugs, a number of people expressed an interest in some sort of chart or document to explain exactly how bass management works on the Model 990. My original review has a few paragraphs discussing this, but it lacked the simplicity of a "snapshot" explanation. Several attempts to fashion a chart outlining the bass management (similar to the equipment charts I've done over the years) failed miserably. Instead, I came up with a diagram that graphically describes the processing and signal routing for different scenarios. This diagram is pictured below and can be downloaded here in PDF format. In addition to my diagram, Outlaw has also provided a detailed tabular summary of the 990's bass management, which is available for both analog inputs and digital inputs. Hopefully the combination of Outlaw's detailed chart and my diagram will help folks get a handle on how the 990's bass management operates.

The diagram describes two cases: General (digital inputs, stereo analog inputs, and the 7.1 Direct analog input) and Stereo Analog Bypass (stereo analog inputs when "bypass" mode is selected). In both cases, each speaker set has a block representing the "large/small" option ("off" is a third option, but it's not shown because there's no signal to show in that case) and the subwoofer has a block showing the on, off, and LR+sub options (the subwoofer's "LFE" option, which appears when the mains are set to large, acts exactly the same as "on"). The "small" option shows both high-pass and low-pass outputs; that block's crossover setting determines where the signal is divided between high and low. Each block has an incoming signal, and each option in that block has an outgoing signal (small of course having two representing the signal division due to the crossover). Those outgoing signals are then connected to the appropriate speaker (including the subwoofer). In some cases, the outgoing signal splits. This represents different behavior due to different combinations of main speaker and subwoofer settings. The dashed line from the mains shows what happens when the mains are set to large and the subwoofer is set to "LR+sub." The dotted line shows what happens to low-pass data from small speakers when there is no subwoofer present (in which case the mains must be set to large). The Stereo Analog Bypass diagram is separate because this particular scenario is independent of the other bass management options. There is no crossover included in this signal path, but if the mains are set to small the 990 will send a summed copy of the left and right channels to the subwoofer.
If you are interested in analysing the behavior of your processor's bass management (whether it's a Model 990 or not), you might want to take a look at my Devious Tiny Disc. What is the Devious Tiny Disc ("DTD" to its friends), you ask? This is a downloadable DVD image file that can be burned onto a DVD-R or a CD-R (the whole image is only about 70MB, so it fits on a CD just fine) and contains a pair of frequency sweep test tones that can help evaluate the bass management without the need for special software or hardware. Because some DVD players won't accept a DVD-formatted CD, I've also got an audio CD image file on the site that contains both the left and right channel tracks. It's not the most scientific approach, but it is pretty straightforward and easy to use. You do need to be careful with it, though, as the test tone starts at 20Hz – don't have your volume cranked up too high when you hit "play."